In this post, we will be making a simplified version of the 2D game "Spooky Speech Spells" (which you can play here) in the Godot game engine using an integration with the Deepgram automatic speech recognition (ASR) engine. Why Godot? Because it is an easy-to-learn, open-source alternative to the popular industry-standard Unity and can export directly to Mac, Windows, Linux, iOS, Android, and HTML5. Why Deepgram? Because it is the fastest, most accurate, cheapest, and easiest to use ASR engine out there! And why make a speech-enhanced game? Well, because it's cool, and games are fun! Beyond that, adding nontraditional input devices can help make your games more accessible.
This tutorial is focusing on adding voice input to your game, but if you want to see more tutorials, you can find plenty on the Godot website.
Pre-requisites
You will need:
Godot installed on your machine - download Godot here. This tutorial was written with version
3.4.3.A Deepgram API Key - get an API Key here.
Try the Game
To run the game we are going to build and browse its files:
Download this repository, open Godot, click "Import", and browse to and select the
project.godotfile from the repo.In the Godot editor, go to the "FileSystem" tab in the lower left, and navigate to and open
Scenes/Game.gd.Edit
line 7ofScenes/Game.gdand enter your Deepgram API Key.In the top right of the Godot editor, hit the "Play" (►) button.
Move your character with
WASDand say "fire" to cast fire spells!
Building the Game
In the following sub-sections, we will walk through step-by-step how to make a game where you can move a character around the screen and have the character cast fireball spells by chanting "fire!" into your microphone.
Setting Up the Project
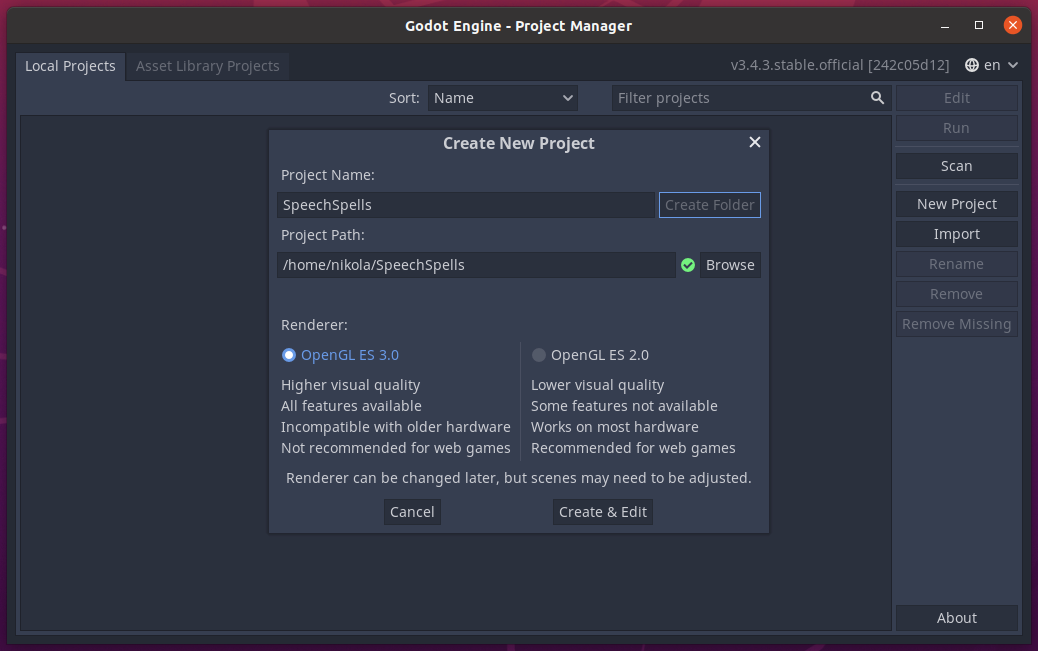
Open Godot and create a "New Project" in the project manager.
 Now click "Browse" and choose a directory on your filesystem to store the project, and in the "Project Name"
field, write "SpeechSpells" and hit "Create Folder." Finally, hit "Create and Edit," and we'll get to the Godot
Editor, where we can build our game.
 The Godot Editor consists of several panels and tabs, and we will be going over the ones we need to interact
with to build "Speech Spells".
Let's start with the "Scene" tab in the upper left panel. In this tab, we can put together "Scenes," which, together with "Nodes," form the basic building blocks of Godot games. Scenes and nodes are classes in object-oriented programming terminology, but the Godot Editor offers an intuitive way to create, edit, and manage our various game objects as scenes and nodes. Scenes can be almost anything - a collection of sprite nodes, a character with animations, attacks, and hit-boxes, or just a collection of scripts that execute algorithms and can emit signals to other nodes (we will see this pattern further on). For now, where it says "Create Root Node" click "2D Scene" and double click the name of the resulting node and rename it to "Game". We will create a few other scenes for this game and add instances of those scenes to our Game scene.
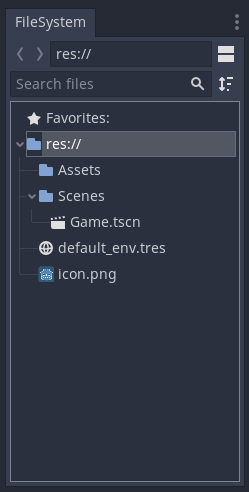
Before saving the scene, let's head over to the lower right "Filesystem" tab. Right-click in the filesystem browser there and click "New Folder..." to create a folder called "Scenes" and then a folder called "Assets". You may, of course, organize your projects however you like, but this is at least one way of doing it.
Click on Scene -> Save Scene in the upper left corner of the editor to save this scene as Game.tscn in the "Scenes" directory that you just created.
 Now, go to
 Project -> Project Settings from the upper left bar, and we will set a couple of properties of our game.
Start by navigating to Rendering -> Environment and change the "Default Clear Color" to black.
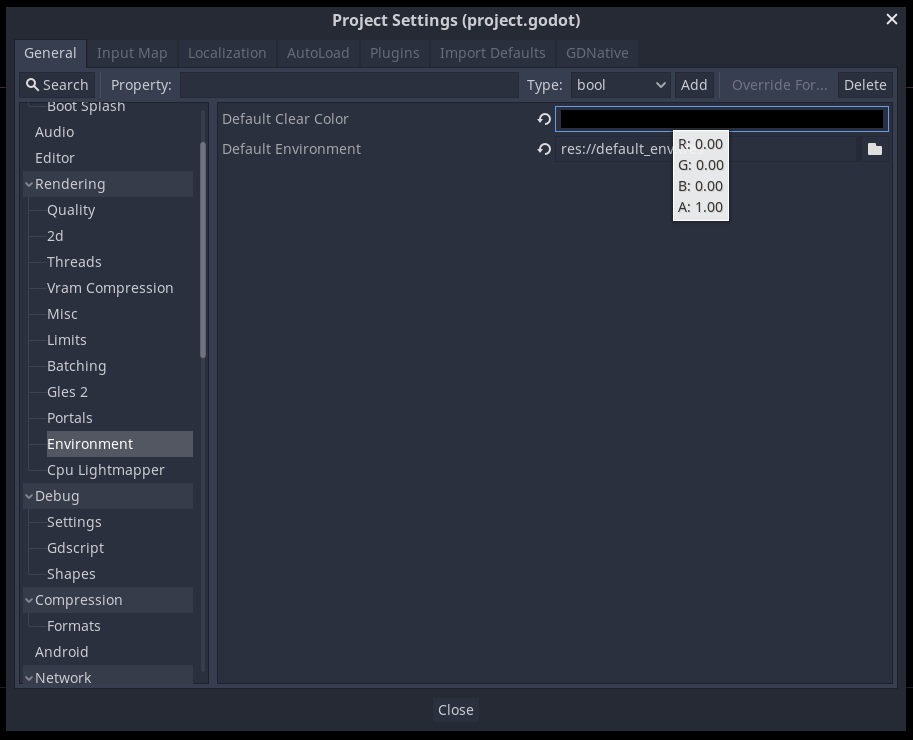 Next, navigate to
 Display -> Window, uncheck "Resizable", set the "Width" to 320, the "Height" to 240,
the "Test Width" to 960, the "Test Height" to 720, the "Stretch" "Mode" to "2d" and the
Stretch "Aspect" to "Keep". This is setting us up to build a game
with a very low resolution close to 240p (common for 8-bit pixel games), but when we run the game it will
display in a nice big 960x720 window, effectively tripling the size of the pixels. Godot has many options
under Display -> Window, and understanding these can enable you to effortlessly build games that look
fantastic at multiple resolutions and multiple aspect ratios targeting different devices without ever
having to think about anything other than your base resolution (320x240 in our case)!
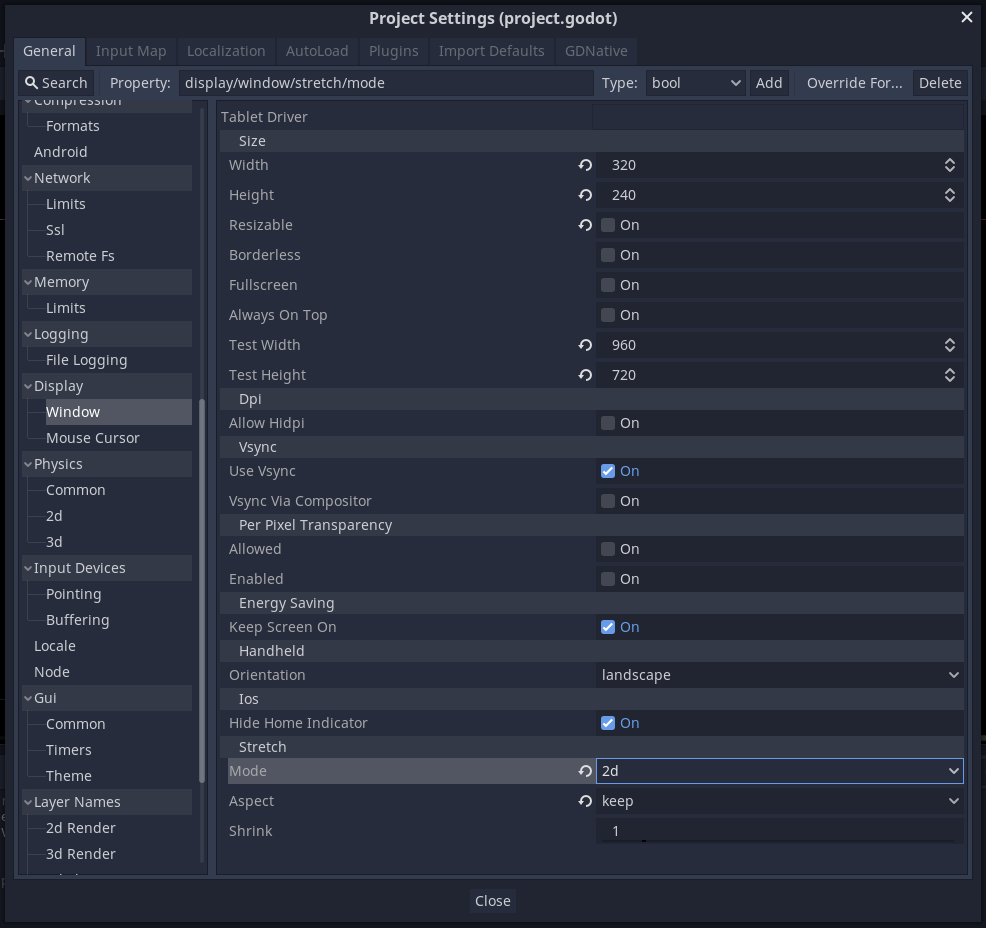 We have one more setting to change - navigate to
 Application -> Audio and check "Enable Audio Input".
A warning will appear saying you will need to restart the editor for this to take effect, click the button
that appears in the lower right ("Save & Restart") to do so.
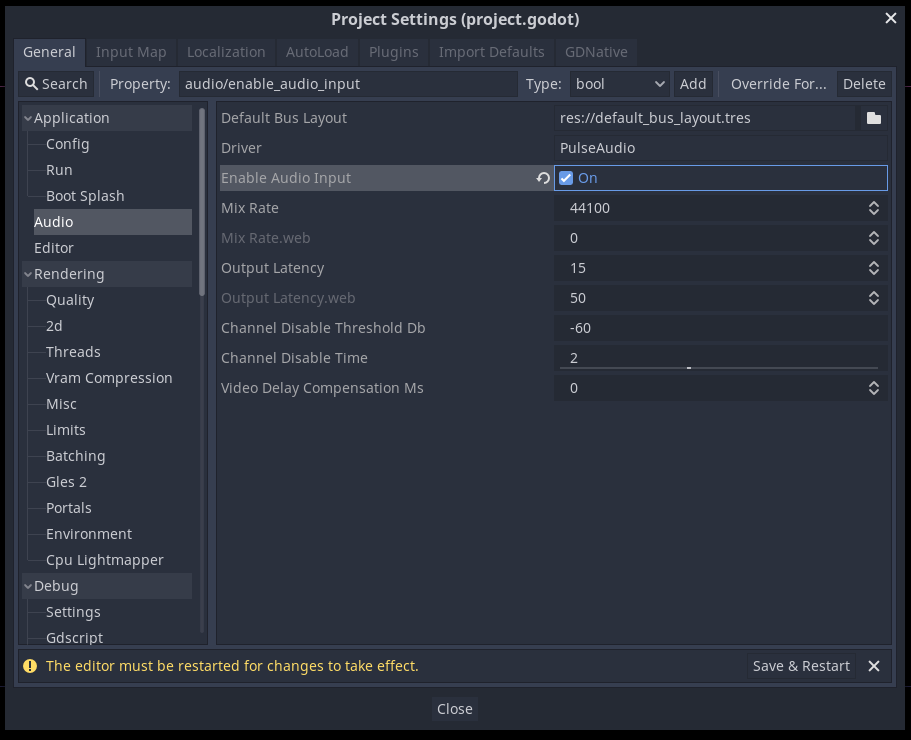 Finally, click the "Play" button in the upper right (or press "F5") to start up the game - since this is the
first time we are playing the game, you will be asked to tell Godot which scene you want to start when the
game is first opened - we only have
 Game.tscn so select that one. We now have a blank canvas ready to be filled!
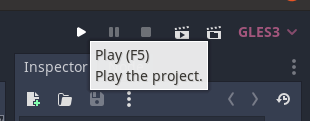 Next, let's create a Player.
Creating a Player
Now that we have a running game in a window let's create a player to move around. In the top left of
the Godot editor, click Scene -> New Scene. Like when you first opened this project, the "Scene" tab
will give you some options for the root node. Click "Other Node" and navigate to, or use the search
field to find "KinematicBody2D" and click "Create."
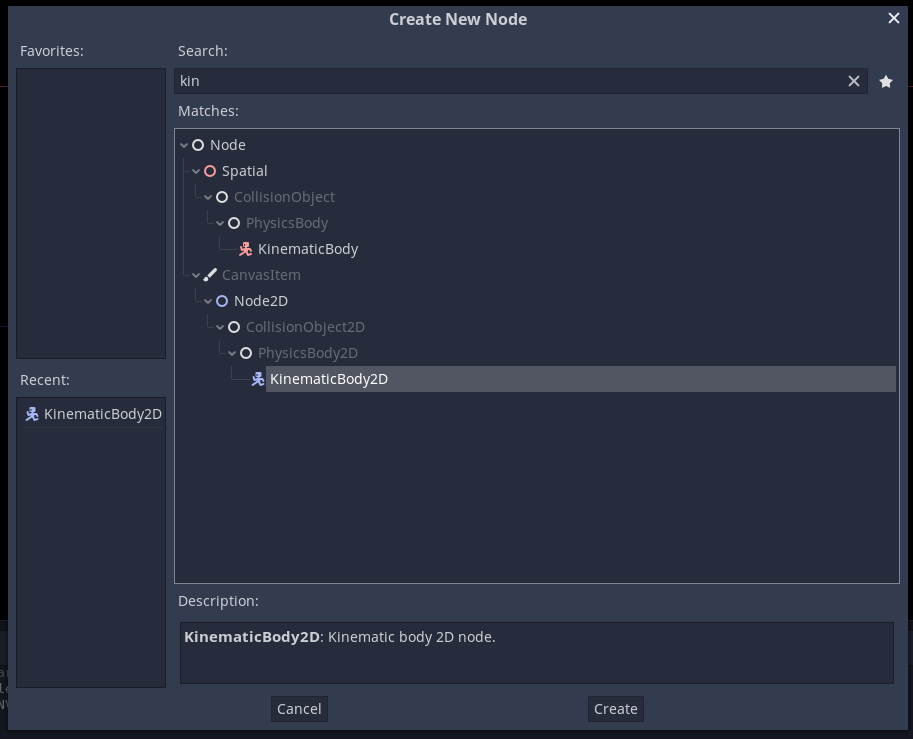 "KinematicBody2D" is one of the most reasonable types of objects to use for controllable characters.
This class/node offers convenient methods to make moving and handling collisions with various objects
easy - we will discuss one of these methods shortly.
Now, right-click the root node and click "Add Child Node" and create a "Sprite" node. Do this again and add a "CollisionShape2D" node. Your node structure should now look like the following:
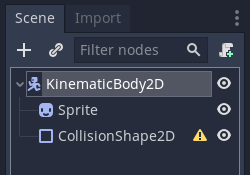 The "Sprite" node will contain the image to use for our player. We will use a pixel art
image of a skull for our player; you can download it here. Drag the
file into the "Assets" directory in the "Filesystem" tab in the lower left, then click on the "Import"
tab next to the "Scene" tab, uncheck "Filter" and click "Reimport":
 This is importing the image into our project and telling our project not to apply interpolation
when scaling the image should the window size change from the base window size (which is a tiny
320x240 for us). Most art assets ought to have some interpolation applied when scaling to smaller
(or larger) resolutions, but this looks notoriously bad for pixel art, where one would expect
the sharp and blocky sprite to remain sharp and blocky at any resolution.
Now, navigate back to the "Scene" tab, click on the "Sprite" node, and drag and drop skull.png
from the "Asset" directory to the "Texture" field:
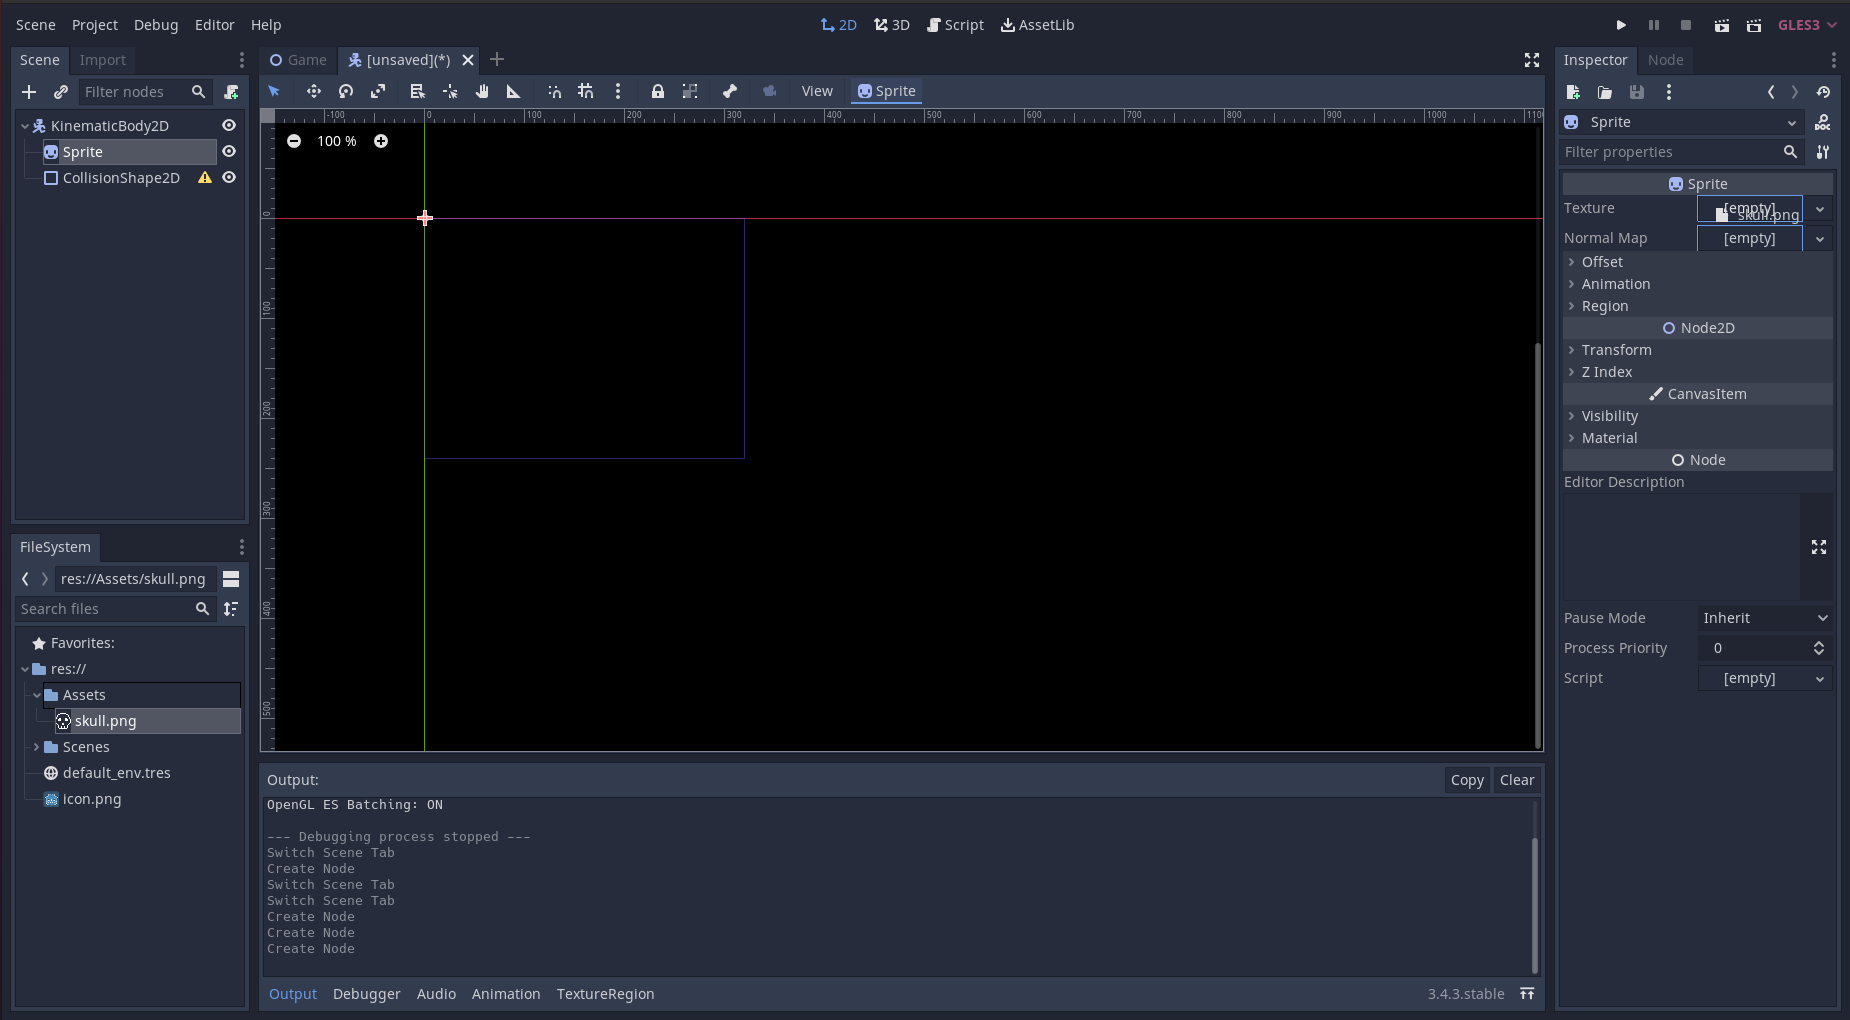 After doing this, you should see an image in the scene's 2D view. Finally, some graphics!
You may want to play around with zooming in or out to get a better view.
Now, click on the "CollisionShape2D" node, then click on the "Shape" field on the upper right and select "RectangleShape2D", and change the "Extents" "x" and "y" fields to both be 8:
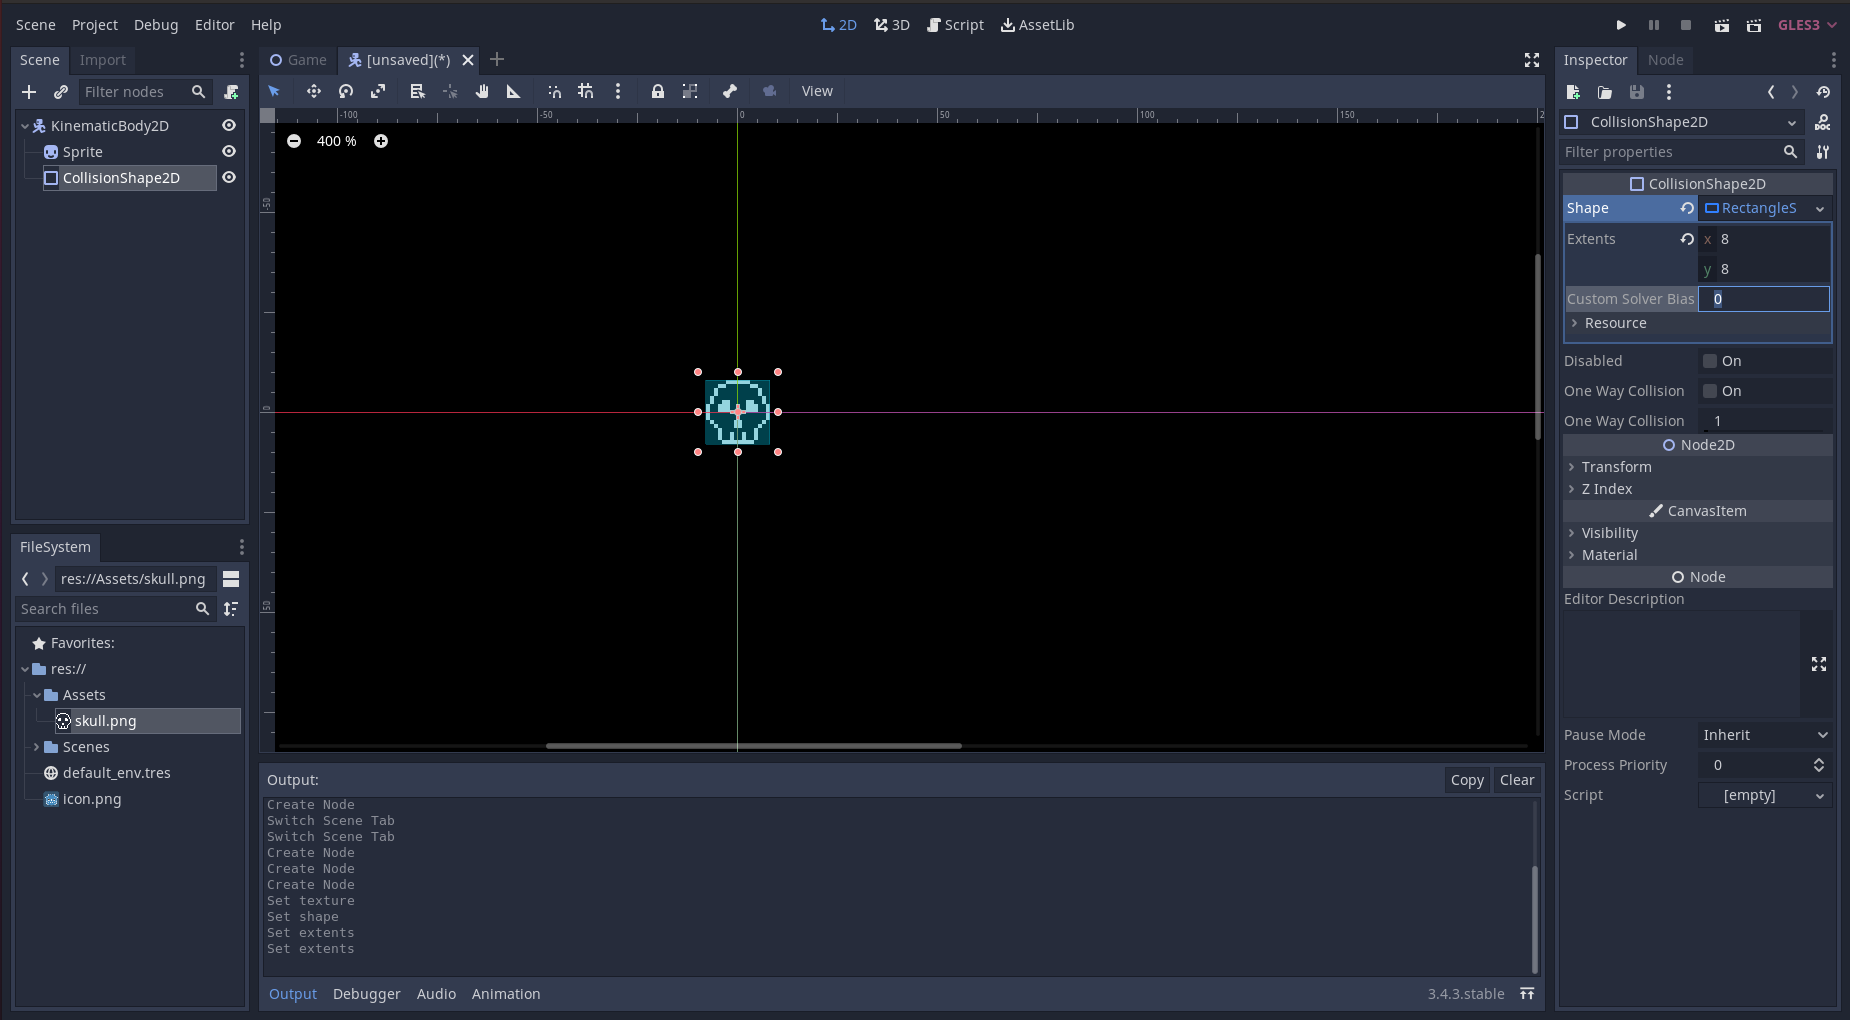 This is essentially defining the hit-box of the player. We won't utilize hit-boxes
or collision detection in this tutorial, but it is good practice to learn how to
set up a player as one typically would in a more involved game.
Rename the root node "Player" and then save the scene as Player.tscn in the "Scenes" directory.
Now, with the root node ("Player") selected, hit the button which looks like a script with a green
plus sign on it to create a script for this node:
 This will create a
 Player.gd script, that will help define how this node functions in the game. .gd is the file extension for GDScript source code. GDScript is one of two languages which Godot uses natively (the other being a visual programming language which is quite fun!). GDScript is a lot like Python, and has a comparatively easy learning curve, helped by the fact that the Godot engine does most of the complicated stuff under the hood, leaving the scripting of game objects to be short and quick. Make the contents of Player.gd the following, and you may start to note how few lines of code it takes to perform some actions:
extends KinematicBody2D
export var speed = 100
var velocity = Vector2(0, 0)

func _physics_process(_delta):
	if Input.is_key_pressed(KEY_W):
		velocity.y = -speed
	elif Input.is_key_pressed(KEY_S):
		velocity.y = speed
	else:
		velocity.y = 0

	if Input.is_key_pressed(KEY_A):
		velocity.x = - speed
	elif Input.is_key_pressed(KEY_D):
		velocity.x = speed
	else:
		velocity.x = 0

	var _returned_velocity = move_and_slide(velocity, Vector2(0, 0), false, 4, 0, false)

	if position.x < 0 - 16:
		position.x = 320 + 16
	if position.x > 320 + 16:
		position.x = 0 - 16

	if position.y < 0 - 16:
		position.y = 240 + 16
	if position.y > 240 + 16:
		position.y = 0 - 16
The first line, extends KinematicBody2D, is telling us that our script is an extension of the "KinematicBody2D" class, meaning we will be able to access any methods and variables that the "KinematicBody2D" class offers, plus any variables and methods that we introduce here in this file. We then define the variables speed and velocity. We will use velocity to mean the velocity of the player at any given time, and speed to mean the maximum horizontal or vertical speed of the player when we move the player.
Next comes the method _physics_process(_delta). This is a method accessible to many Godot nodes, and is executed
roughly 60 times per second, allowing us to alter objects in a way that the physics engine can understand.
The "delta" argument is the amount of time that has passed since the last call to _physics_process, but here we
are not using it, so we place an underscore in front of the argument name to avoid a warning.
In this method, we check if the WASD keys are pressed, and modify the player's velocity accordingly ("W" to move up,
"A" to move left, "S" to move down, and "D" to move right). Note that to move up, we set the "y" velocity to -speed - this
is because Godot, like many game engines, considers down to be the positive y-direction.
After adjusting the player's velocity, we call the move_and_slide method, specifying the velocity as one of its arguments
(the others don't matter for now). This method does a lot of logic internally and can handle collisions with static bodies
and rigid bodies, of any shape or size, and correctly move the player along the surface of bodies instead of bouncing
off of them (hence the "slide"). The method returns the resulting velocity of the player after any collisions/slides,
but since we won't be using this, we place an underscore to avoid a warning.
Lastly, we check and modify the position of the player to wrap around the window - i.e. if the player moves too far to the left, have them wrap to the right side of the window.
Save, and finally go back to the "Game" scene, and click the button at the top of the "Scene" tab to "Instance Child Scene":
 Select the
 Player.tscn we just created. Now our main "Game" scene has a "Player" scene as a child node! Click the "Play" button
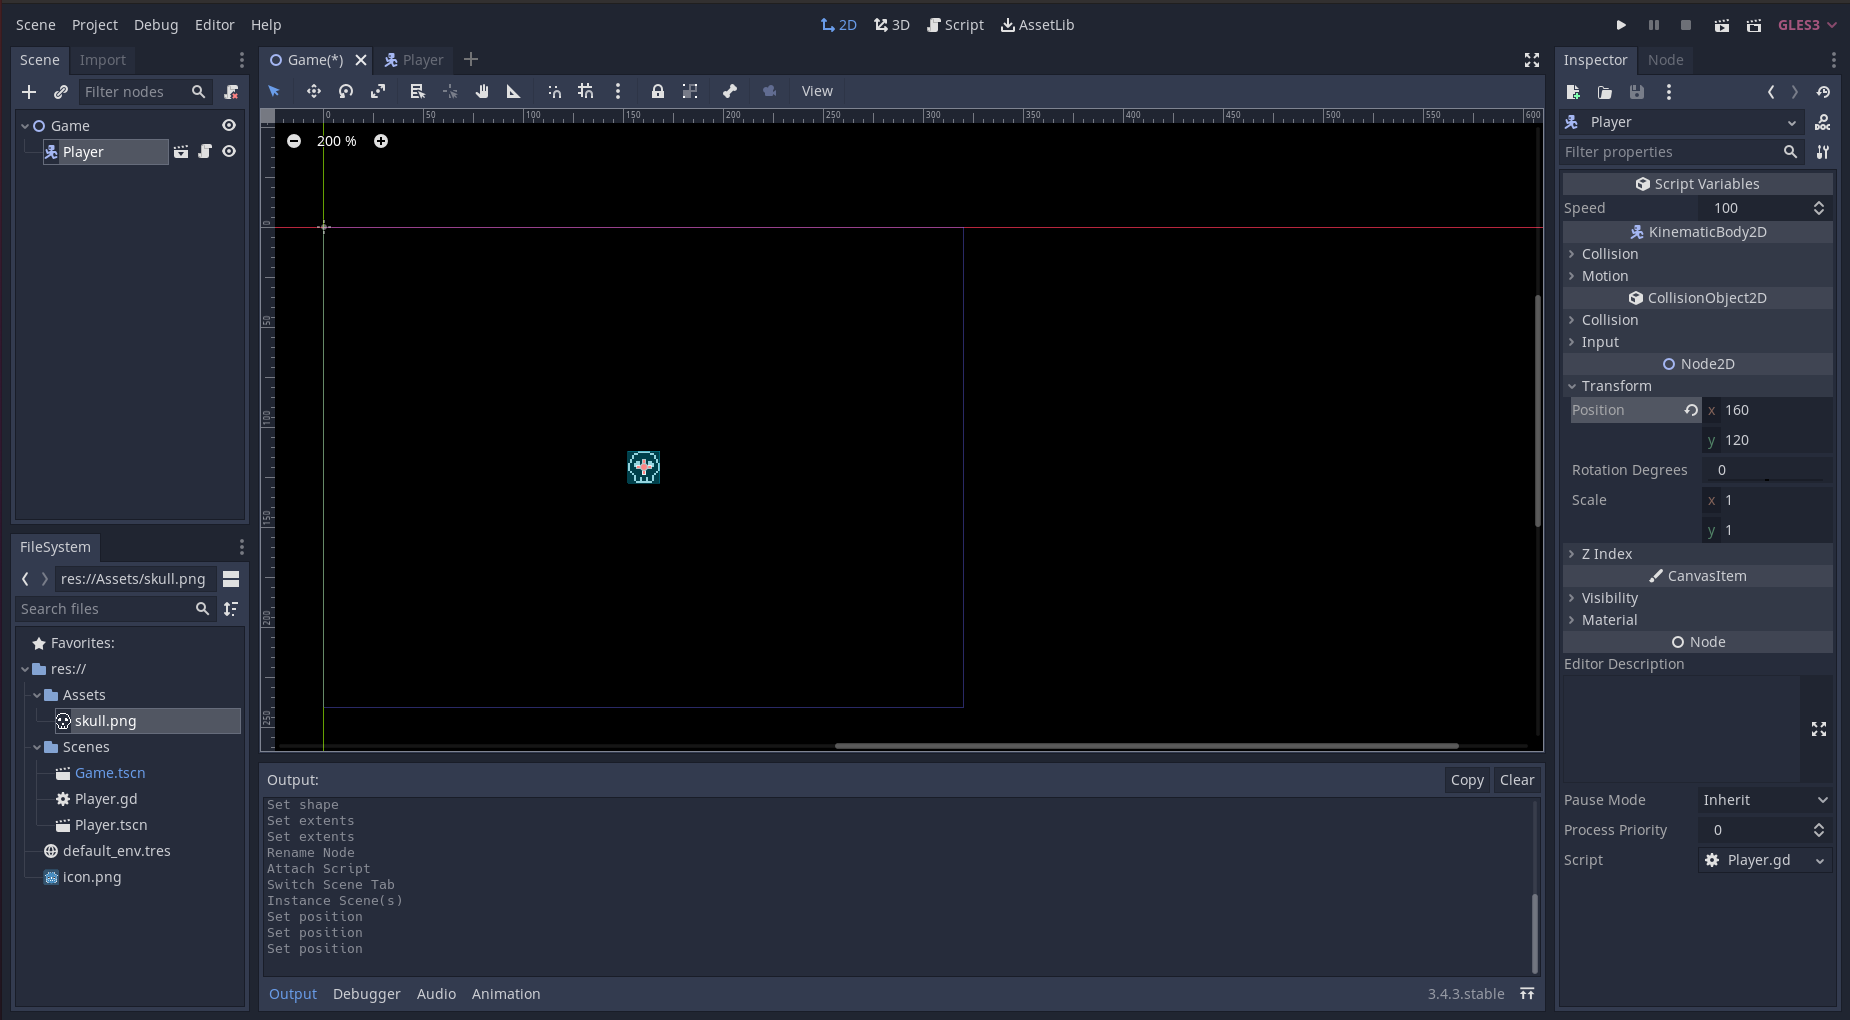
and now the game boots up with a skull in the corner - you can move the skull around with WASD! Feel free to reposition the skull
in the "Game" scene - you can either click and drag the player in the 2D view, or you can directly enter the x and y position
in Node2D -> Transform -> Position in the "Inspector" tab when the "Player" node is selected in the "Game" scene:
Creating a Fireball
Let's make a fireball scene which we will use to have the player shooting fireballs across the screen. Create a new scene, for the root node click "Other Node" and pick "Area2D". Rename this root node "Fireball". Add two child nodes: an "AnimatedSprite" and a "CollisionShape2D".
Next, import into your "Assets" directory fireball_1.png and fireball_2.png. The two sprites will make up our fireball animation. For each of the imported fireball sprites, go to the "Import" tab, uncheck "Filter" and click "Reimport" - just like for our pixel art player sprite, this will ensure that these sprites maintain their blocky pixel form even on high-resolution displays.
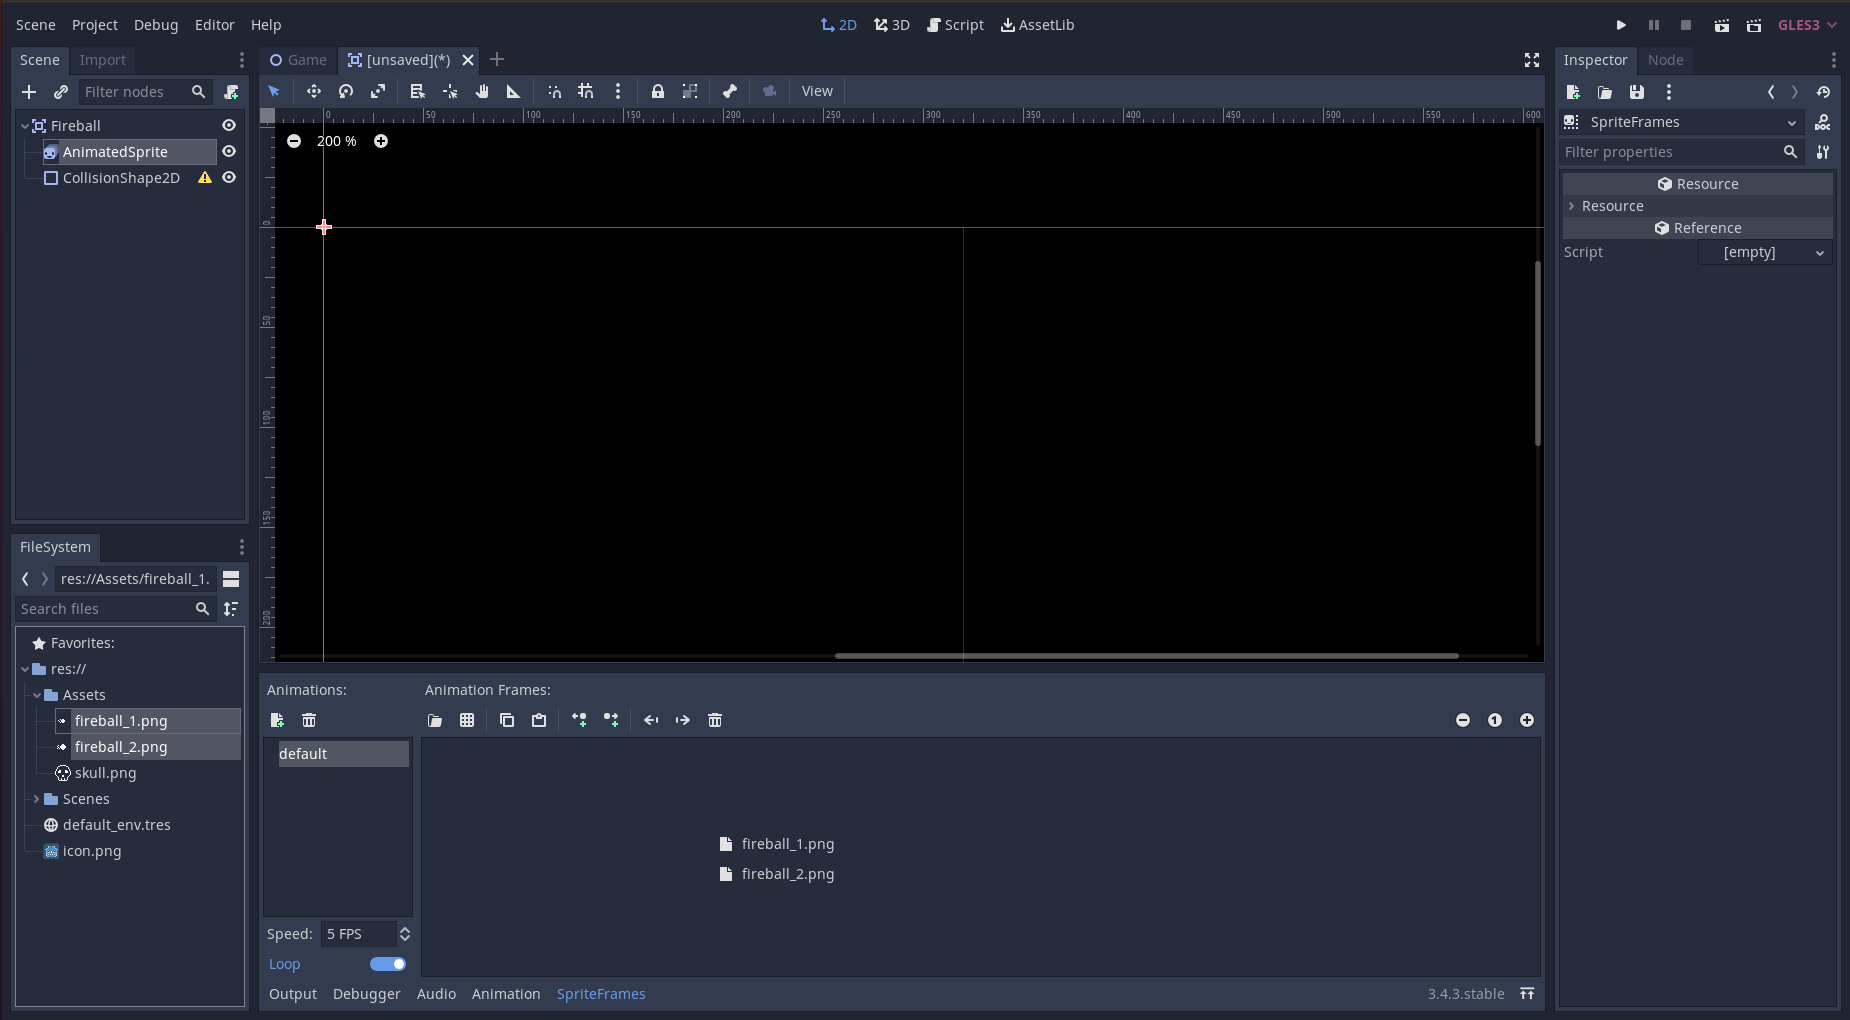
Now, click the "AnimatedSprite" node, and on the right in the "Frames" field, click where it says "[empty]" and select
"New SpriteFrames". Then click the field again and you should be brought to an editor view where we can add our animation.
Click and drag the fireball_1.png and fireball_2.png files from the "Assets" directory into the "Animation Frames" box:
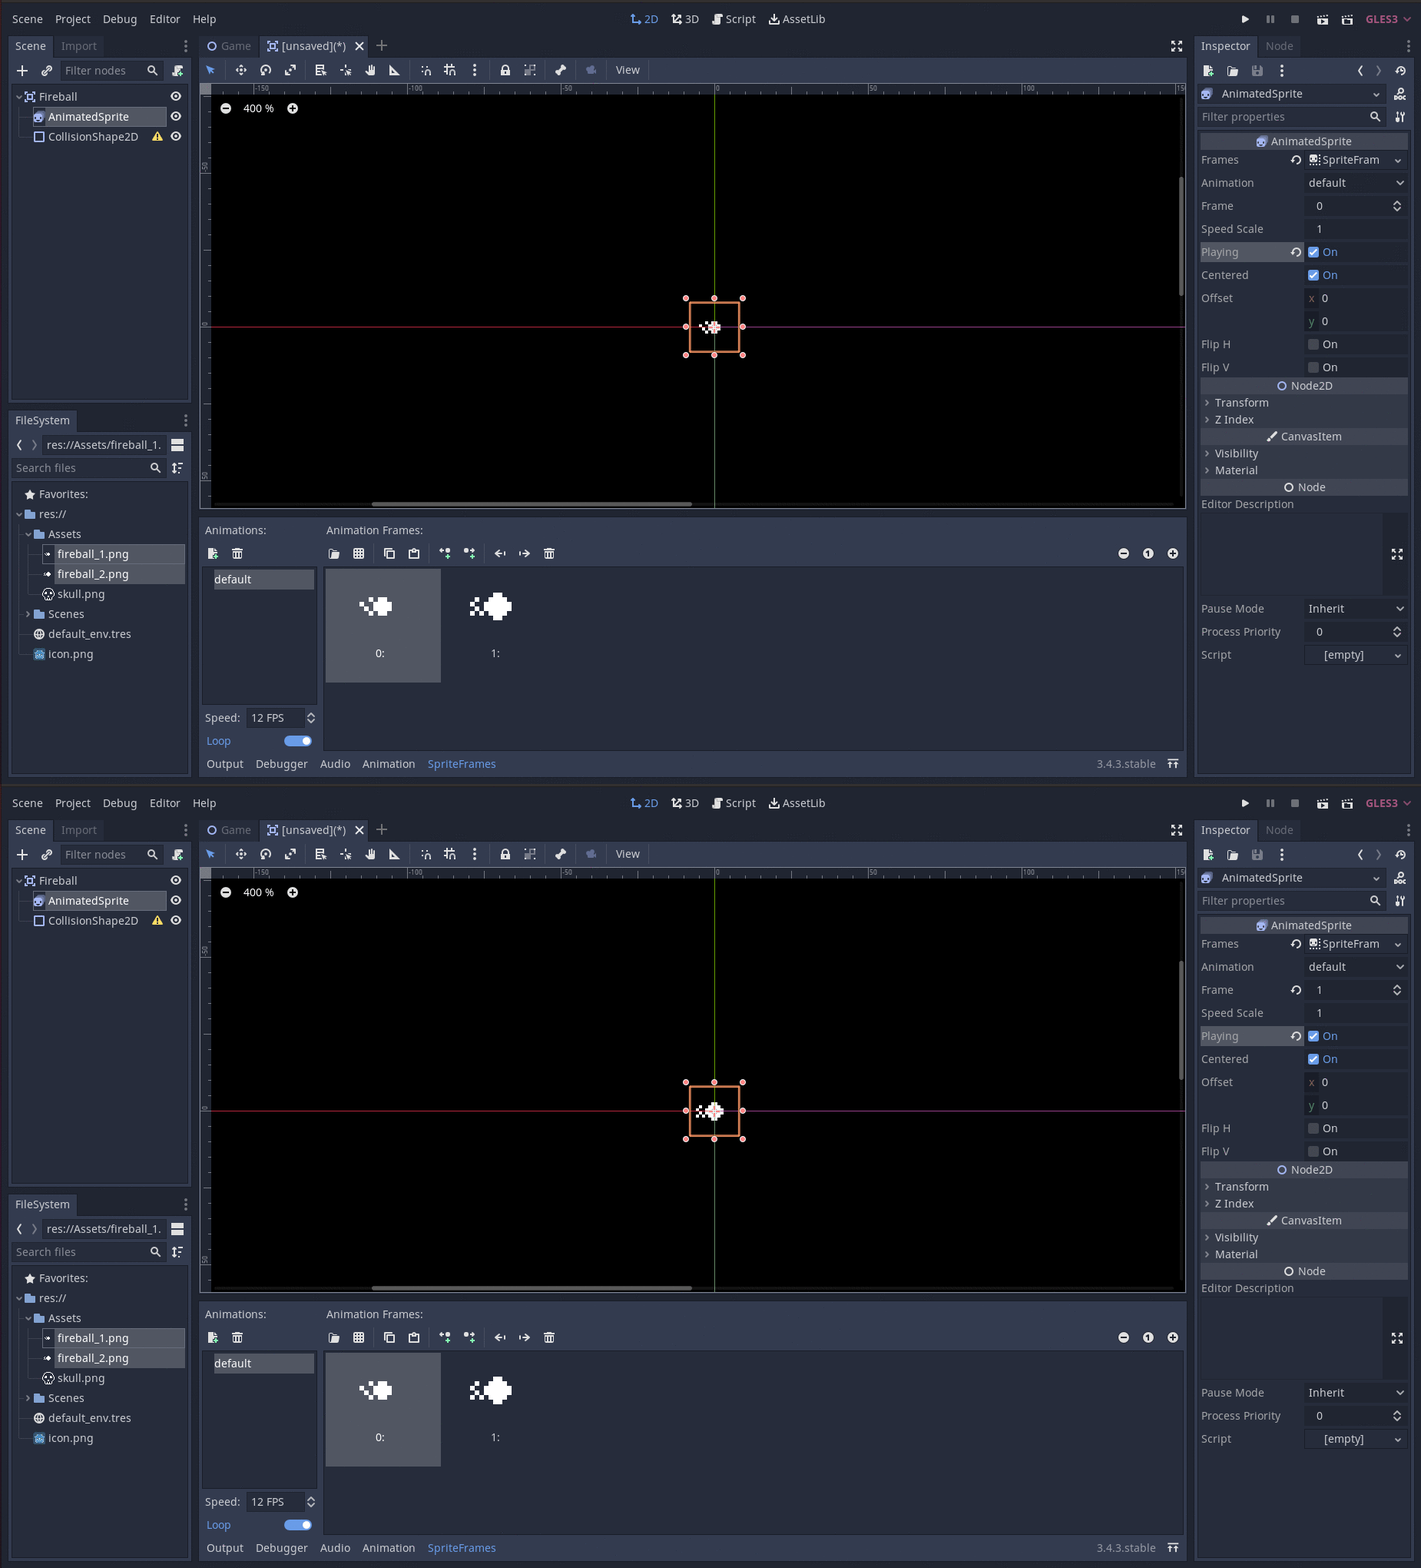
 Next, click the "AnimatedSprite" node again to bring up the "Inspector" tab for this node again, check the box titled "Playing".
In the lower-left of the "Animations" tab, change the "Speed" field to "12 FPS". The fireball should now be animated in the editor:
 There are certainly several tabs and fields to navigate through in this process, but I hope you find some of these operations intuitive!
To create animations, you drag the individual frames into the "Animation Frames"
box, you can then change the speed of the animation just left of this box, and you can set which animation plays by default
in the "Animation" field of the "Inspector" tab for the "AnimatedSprite" node - here you can also set whether the animation
is turned on or off with the "Playing" check box.
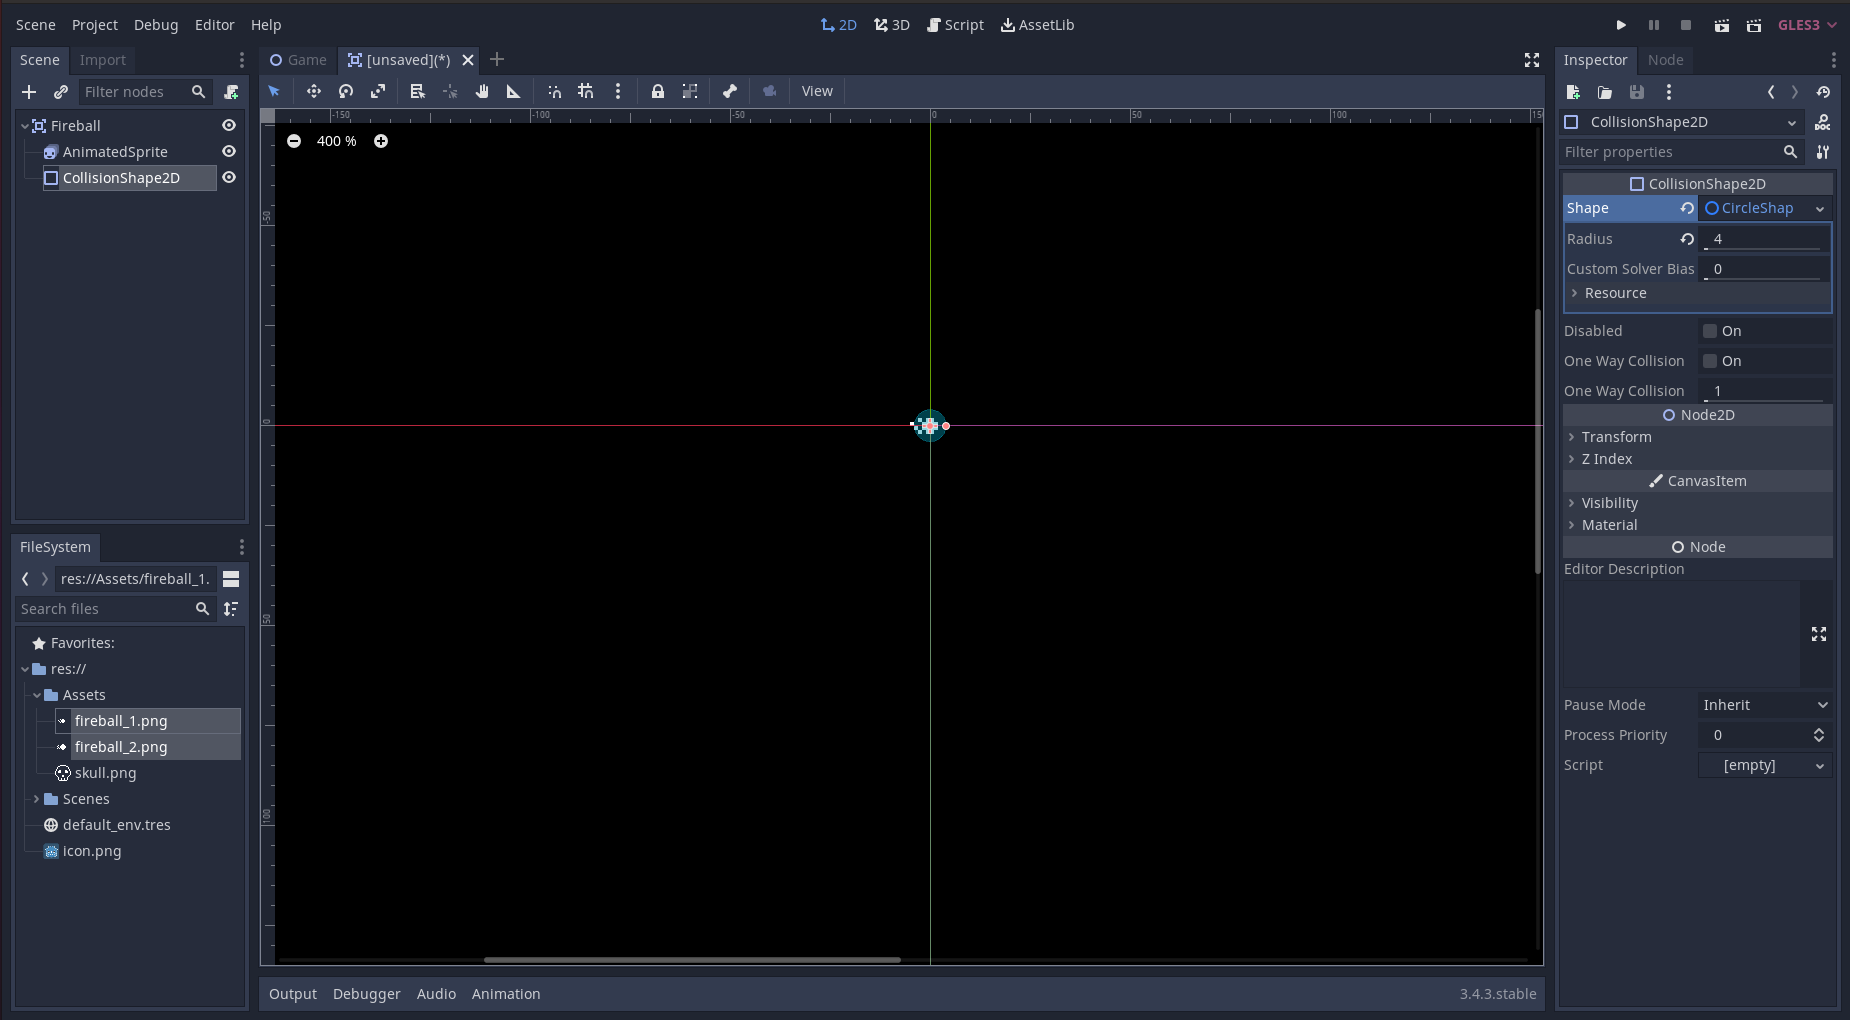
Now, click the "CollisionShape2D" node, and in the "Inspector" tab for the "Shape" field select "New CircleShape2D". Then click the "CicleShape2D" to edit it's properties and change its radius to 4:
 Now, save the scene as
 Fireball.tscn in the "Scenes" directory, and then attach a script to the root node. Make the contents of the script as follows:
extends Area2D

    export var speed = 220
    var direction = Vector2(0, 0)

    func _physics_process(delta):
    	var velocity = direction.normalized() * speed

    	rotation = velocity.angle()
    	position += velocity * delta

    	if position.x > 320 + 16:
    		get_tree().queue_delete(self)
    	if position.x < 0 - 16:
    		get_tree().queue_delete(self)
    	if position.y > 240 + 16:
    		get_tree().queue_delete(self)
    	if position.y < 0 - 16:
    		get_tree().queue_delete(self)
Like with the "Player" scene, we are extending the root node's class, in this case an "Area2D." We will give each fireball object a speed and a direction. When _physics_process is called, we will update the fireball's position and angle according to the fireball's direction and speed. If the fireball goes off-screen, we will destroy it using get_tree().queue_delete(self).
That's all there is to the "Fireball" scene, but we haven't actually added any fireballs to our game. We could do this by instancing a "Fireball" scene in our "Game" scene, but for these kinds of objects, there's a better way - we should spawn them via code!
Triggering the Fireball With Keystrokes
Go to the "Game" scene and add a script to the root node, just like we did for the "Player" scene. Then edit Game.gd to have the following contents:
extends Node2D

    var rng = RandomNumberGenerator.new()

    func _ready():
    	rng.randomize()

    func _input(event):
    	if event is InputEventKey and event.pressed:
    		if event.scancode == KEY_F:
    			for i in rng.randi_range(2, 5):
    				spawn_fireball()

    func spawn_fireball():
    	var fireball = load("res://Scenes/Fireball.tscn").instance()
    	add_child(fireball)

    	var random_angle = rng.randf_range(0.0, 2 * PI)
    	fireball.direction = Vector2(cos(random_angle), sin(random_angle))
    	fireball.rotation = fireball.direction.angle()
    	fireball.position = $Player.position
The first line, extends Node2D, is essentially saying that this object is extending the "Node2D" class. Then, we create a global variable for this object called rng which will be used for random number generation. Next, we define the _ready() method which is called when an instance of this scene gets created - in this method we are initializing our random number generator.
The _input(event) method gets called every time there was an input event such as a keystroke, a mouse click,
a touch, a game-pad button press, etc. In our case, we are looking to see if the "F" key was pressed, and if
so, we want to spawn 2-5 fireballs!
The logic handling the spawning of fireballs occurs in the method spawn_fireball(). Here we create an instance
of our "Fireball" scene, add it as a child of the current scene, and then initialize the fireball's direction,
rotation, and position. We are setting the fireball to spawn exactly where the player object is located,
and we are setting the fireball's direction to be totally random.
The syntax $Player is syntax sugar
for get_node("Player") and requires that our "Game" scene has a child node named "Player" (which it does!).
However, since GDScript is very much like Python, the game will build and run just fine if one makes
a reference to a non-existent object - this will be caught only when the program reaches that line of code,
and it will cause a crash. As Python developers are likely aware, this is sometimes one of the trade-offs of
having a "quick and easy" language.
You should now be able to play the game, move the player around, and press "F" to fire off fireballs! Now that the basic game is complete, let's add the juicy part by triggering the fireballs not with key presses, but with your voice!
Triggering the Fireball With Your Voice
Finally, let's do our Deepgram integration so that we can spawn fireballs by saying "fire" into the microphone instead
of pressing a key. To do this, grab the DeepgramIntegration directory from Scenes/DeepgramIntegration
from the the SpeechSpells repository and place it in the Scenes/ directory in the Godot editor.
This integration contains two Godot scenes with accompanying scripts: MicrophoneInstance and DeepgramInstance.
We won't go over the inner-workings of these scripts in detail, but feel free to have a look as they have
a fair amount of descriptive comments to help explain what is going on. In a nutshell, the MicrophoneInstance
interfaces with your device's microphone and streams the raw audio from the microphone via Godot signals
to the DeepgramInstance which handles connecting to Deepgram via Websockets.
The DeepgramInstance then forwards the raw microphone audio to Deepgram, receives ASR results from Deepgram,
and then forwards those results via Godot signals to some other node. In our case, this other node will be
our "Game" scene's root node.
Note: A common issue which causes the microphone capture to fail on Mac is if Godot's audio sample rate is set to
something different then the OS's audio sample rate. If you experience issues with microphone capture on Mac, you
can check your OS's audio sample rate under Utilities -> Audio Midi Setup.
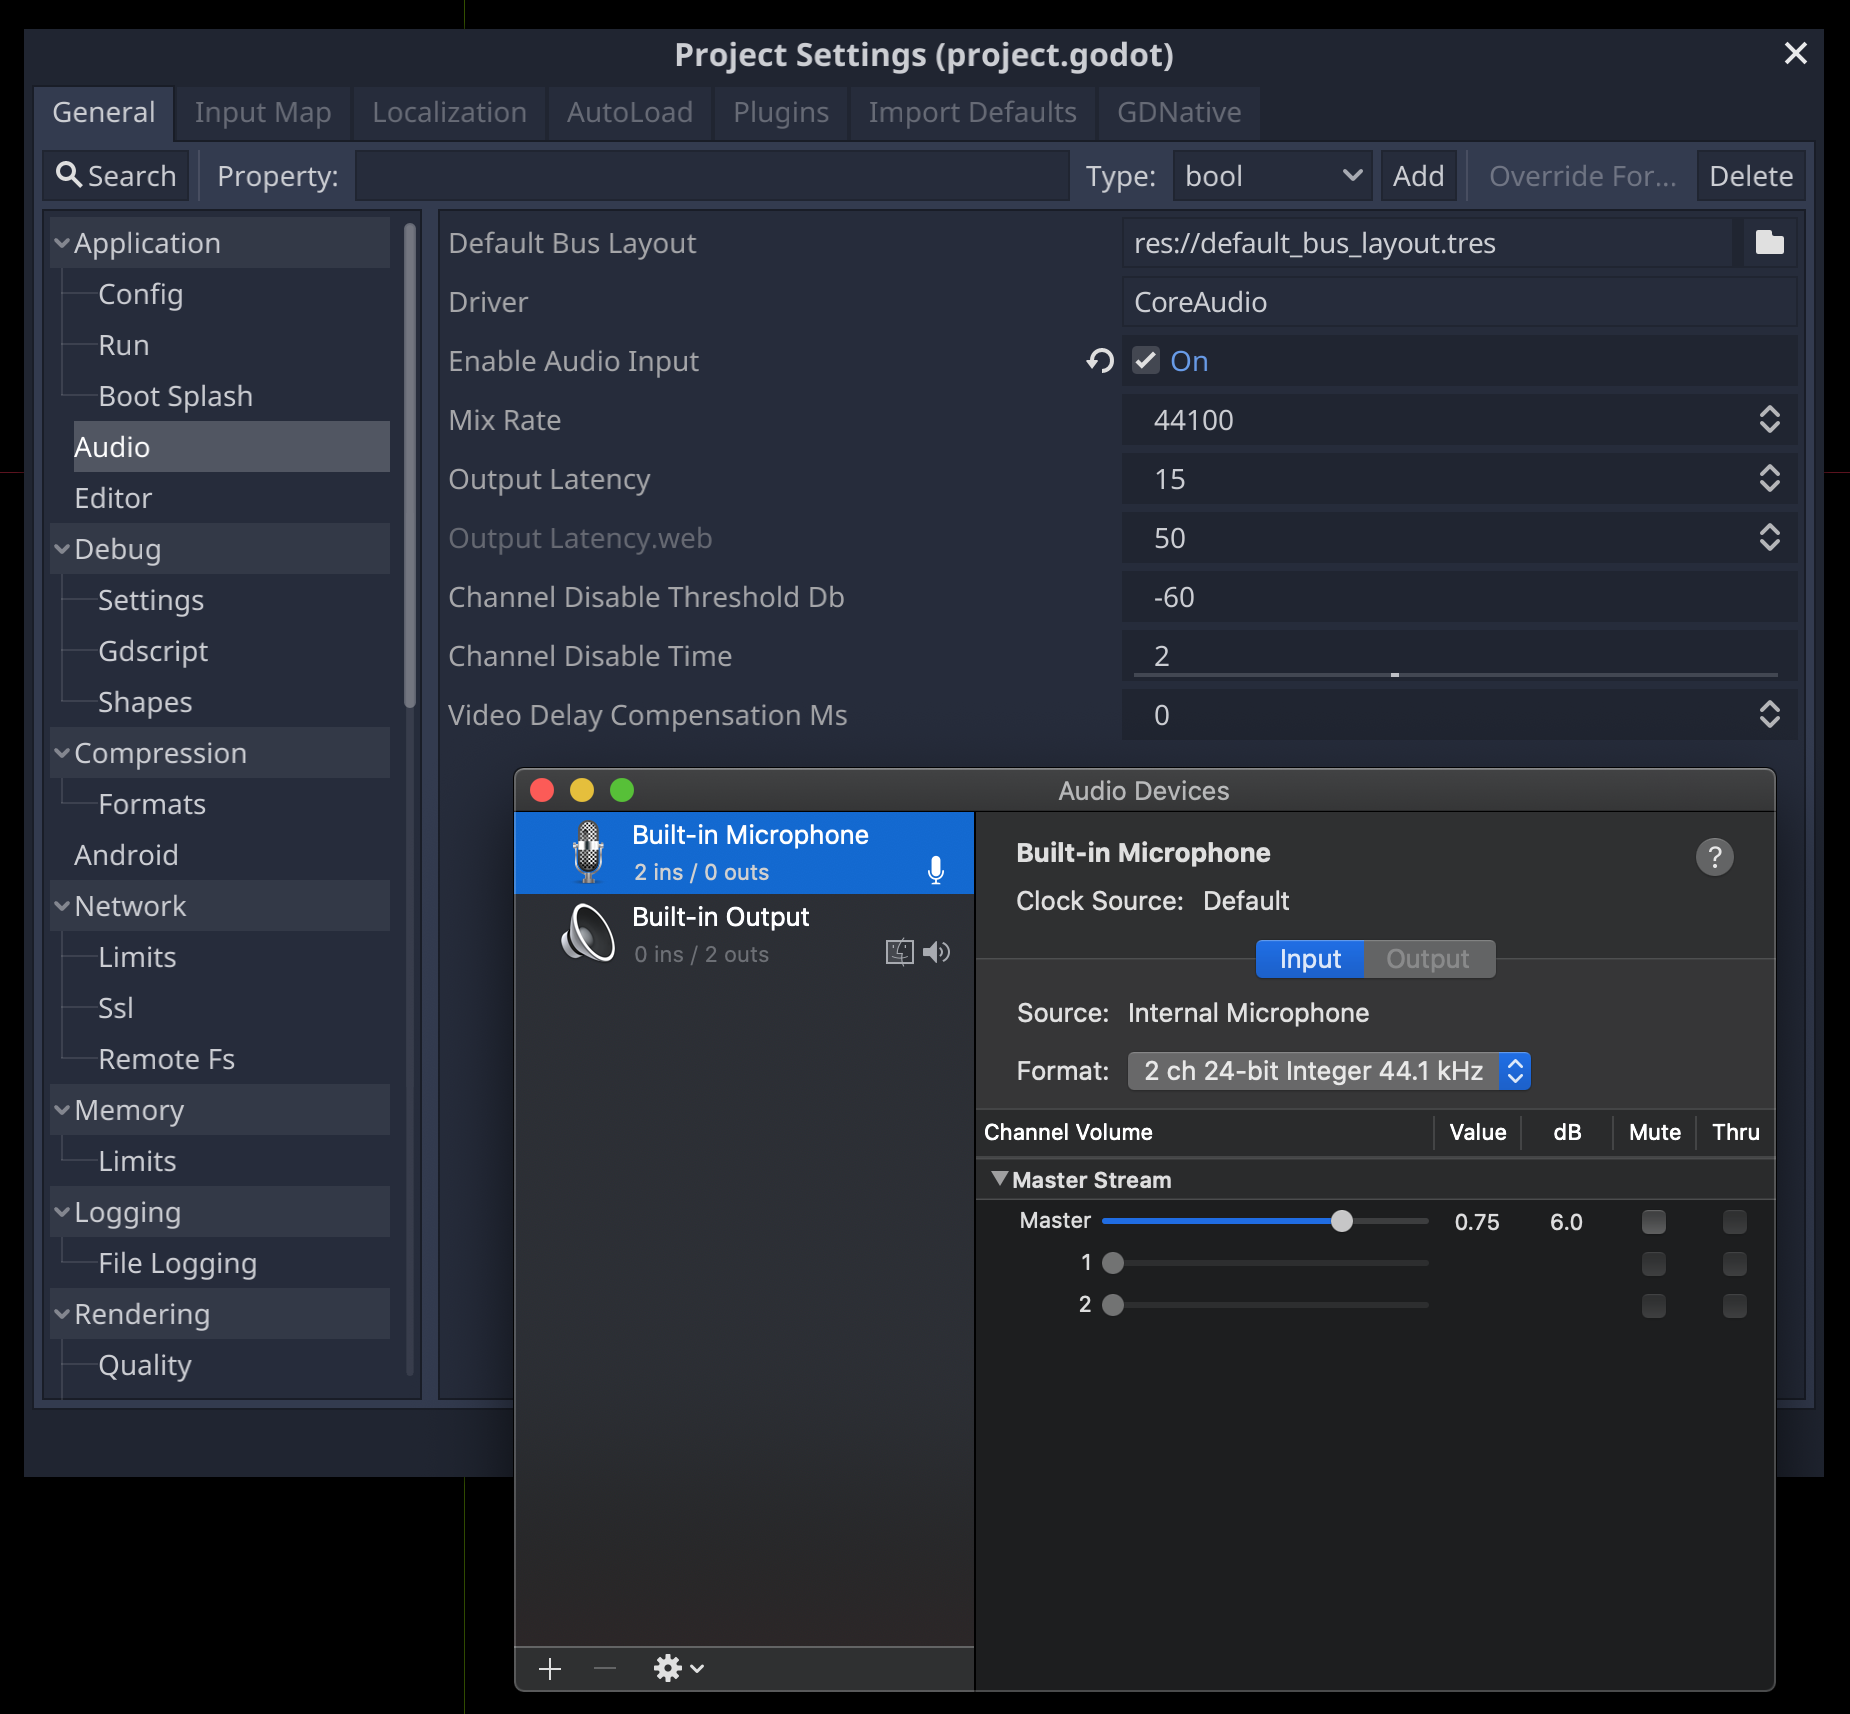
In your "Game" scene, add as a child an instance of the "DeepgramInstance" scene, then modify Game.gd as follows:
extends Node2D

    var rng = RandomNumberGenerator.new()

    func _ready():
    	rng.randomize()
    	$DeepgramInstance.initialize("INSERT_YOUR_API_KEY_HERE")

    func _on_DeepgramInstance_message_received(message):
    	var message_json = JSON.parse(message)
    	if message_json.error == OK:
    		if typeof(message_json.result) == TYPE_DICTIONARY:
    			if message_json.result.has("is_final"):
    				if message_json.result["is_final"] == true:
    					var message_transcript = message_json.result["channel"]["alternatives"][0]["transcript"]
    					print("Transcript received: " + message_transcript)
    					for _i in message.count("fire"):
    						spawn_fireball()

    	else:
    		print("Failed to parse Deepgram message!")

    func spawn_fireball():
    	var fireball = load("res://Scenes/Fireball.tscn").instance()
    	add_child(fireball)

    	var random_angle = rng.randf_range(0.0, 2 * PI)
    	fireball.direction = Vector2(cos(random_angle), sin(random_angle))
    	fireball.rotation = fireball.direction.angle()
    	fireball.position = $Player.position
Remember to replace INSERT_YOUR_API_KEY_HERE with your Deepgram API Key.
Now, to finish up, click your "Game" scene's "DeepgramInstance" node and in the right panel click the "Node" tab (it should be right next
to the "Inspector" tab). You should see a message_received() signal listed under DeepgramInstance.gd - double click this,
make sure that the "Game" node is highlighted, and click "connect".
What is this signal doing? Signals are a useful way to organize the transmission of events in game engines. In this particular case, the "DeepgramInstance" node is signaling to its parent "Game" node that it has received a message from Deepgram. It passes this message with the signal, the parent "Game" node can then react to the signal to trigger further logic.
In our case, the "Game" node handles this signal in the _on_DeepgramInstance_message_received method where tries to parse
the JSON message from Deepgram into a data structure similar to a Dictionary using JSON.parse(message).
After verifying that the message successfully parsed as a Dictionary, it checks to see whether this is a final result or an interim result. To understand the difference between final and interim results in the Deepgram realtime streaming API, check out this page. For our purposes, we are only considering final results. We then grab the transcript from the first alternative in the ASR result, and count how many times the word "fire" appears in the transcript, spawning one fireball for each occurrence.
Build New Features
So now you can walk around and cast fireball spells with your voice! Here are some ideas for next steps you may want to try out to make a more fully-featured game:
Implement more spells! Try a thunder spell, or an ice beam spell.
Add enemies and implement collision detection to destroy enemies when your spells hit them.
Try using interim results instead of just final results - this should decrease the latency of the spells substantially, but you will need to watch out for double-counting as multiple interim results will give transcripts for the same section of audio!
Play around with Deepgram's
keyword,search, and/orphonemefeatures to implement spells for out-of-vocab words.If you are feeling ambitious, work through some Godot networking tutorials to create a multiplayer game where you and your friends cast spells at each other!
Final Thoughts
Speech-enhanced games have actually been around for quite some time, with popular titles such as "Hey You, Pikachu!" and "Seaman", but it hasn't been until more recently that ASR engines have really taken off and can start to offer gameplay experiences which are deeper than the simple command-based games of the past which only understood a few phrases. With modern ASR engines like Deepgram's, understanding thousands of commands has become trivial, and much more interesting and complex uses for speech in games is now possible. I encourage anyone interested to try things out and explore with us what the future of speech in games might look like! Off the top of my head, I want to lastly share some game ideas to get the creative juices flowing in the community:
An RPG where warriors fight with swords, archers fight with bows, and mages fight with... speech! Take the "casting spells" approach of this tutorial and expand it to a game about incantations! (See "In Verbis Virtus" for even more inspiration here!)
Speech-enhanced mini-games: imagine playing a Zelda-esque game where you walk into a town and go to the nearest mini-game building and have to play word games ala "Wheel of Fortune" to win your next upgrade!
Games fully controllable via speech: traditional turn-based games are a great candidate to integrate speech controls, and this could greatly increase the accessibility of such games! This type of technology does exist, but it can likely be greatly improved with new powerful ASR engines like Deepgram.
Casual social games: imagine playing word and speech-based games in an environment like VR chat!
AI-based visual novels: imagine playing a visual novel where instead of picking from a list of phrases to progress, you simply say what's on your mind!
AAA AI-enhanced experiences: take the visual novel idea to the next level and enhance AI components of AAA titles by allowing your character to talk to NPCs with a microphone! (Check out games like "Phasmophobia" for even more inspiration here!)
If you have any questions, please feel free to reach out on Twitter - we're @DeepgramDevs.
If you have any feedback about this post, or anything else around Deepgram, we'd love to hear from you. Please let us know in our GitHub discussions .
More with these tags:
Share your feedback
Was this article useful or interesting to you?
Thank you!
We appreciate your response.
